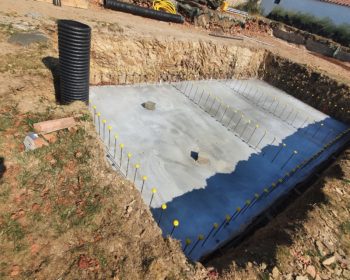
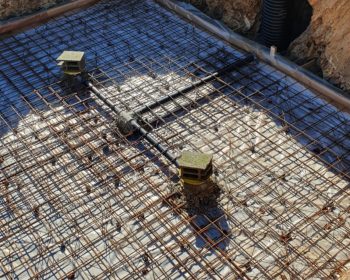
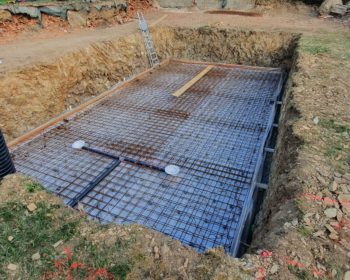
Evolving design

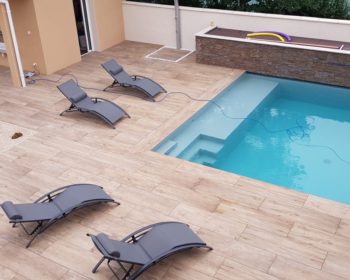
As I have previously commented, my plans tend to evolve and just in case you thought that they were pretty extravagant already, I have just decided to notch it up even further. My plan all along has to have a feature wall above the deep end, with a waterfall projecting…

Continue reading

Checking the slab

We came down the following morning to check the slab and find that it has hardened sufficiently to go down for a closer inspection. Putting the laser level on points across the slab make me feel better about the exploits the previous day, as we are generally only 2-3mm out…

Continue reading

Pouring the slab

The day has finally arrived to pour the concrete slab and we went out early to check all the levels again. All appears to be fine and nothing has moved. Two pumps arrived on ahead of schedule and the drivers we both excellent and helpful. However, the self-placing (beton autoplaçant)…

Continue reading

Vertical junctions installed

Ensuring a good connection between the slab and walls is critical for structural integrate. We have chosen to connect these two components together by 60x60cm L-Shaped 10mm reinforced steel bar (as seen in the foreground below). This has been laid at 25cm intervals all around the perimeter, which should result…

Continue reading

Bottom drains installed

We bought a number of individual parts from various places, including the local DIY store (Bricomarche), to make up a pressure testing rig that we can use to test the connections on various plumbing parts. In the simplest of terms it is a hosepipe connector attached to a central heating…

Continue reading

Second layer installed

The second layer of reinforced steel mesh has now been laid. It is at this point that we realise why the full size ST25C would have been useful. We have to place two sheets per width, which means that in some places we have four sheets overlapping, causing potential high…

Continue reading